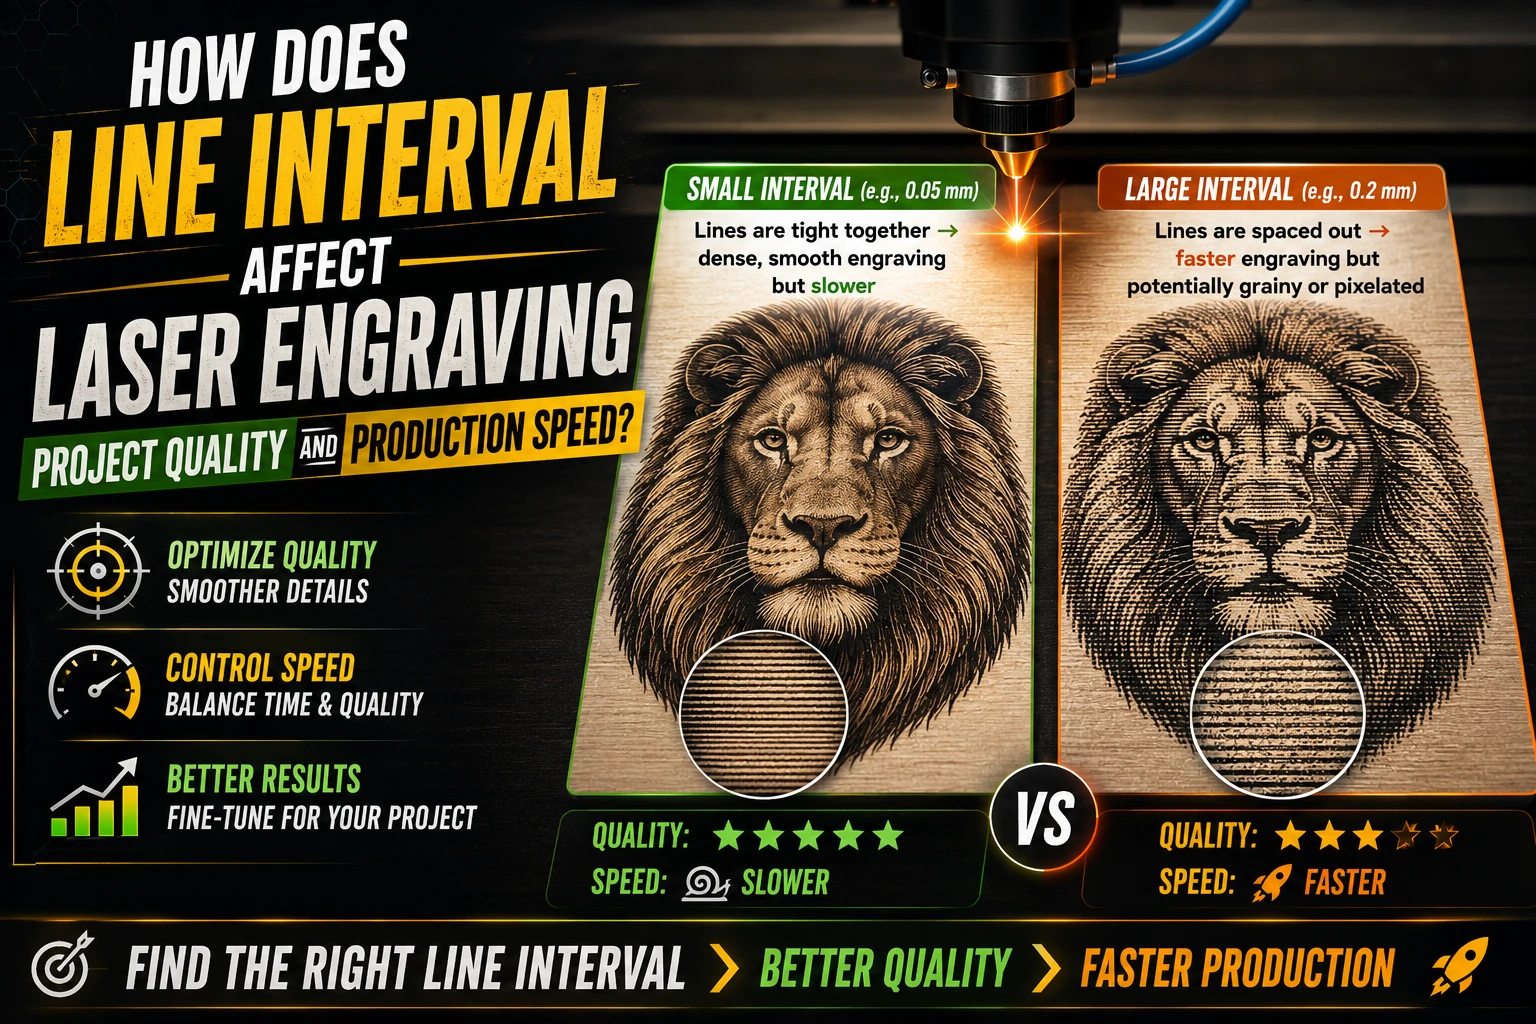
How does line Interval Affect Laser Engraving Project Quality and Production Speed?
Hi, I’m Dhanraj Mahurkar, creator of Radium Files. If you’ve ever watched your laser engraver churn through a project and wondered, “Why does this look pixelated?” or “Why did this take 3 hours when it should take 30 minutes?”—you’ve stumbled on the exact problem line interval solves.
After years of testing SVG and DXF files on my own wood laser cutter, I’ve learned that line interval is the hidden dial between “maker disappointment” and “wow, that’s professional.”
Let’s break down what it actually does, why it matters for your woodworking laser cutter projects, and how to dial it in for the perfect balance of quality and speed.
What Is Line Interval in Laser Engraving?
Line interval is the distance between consecutive laser lines in an engraving pattern. Think of it like the spacing between rows in a garden:
- Small interval (e.g., 0.05 mm): Lines are tight together → dense, smooth engraving but slower
- Large interval (e.g., 0.2 mm): Lines are spaced out → faster engraving but potentially grainy or pixelated
Understanding how to tweak it lets you adapt to your specific laser engraving on wood, metal, or acrylic projects.
How Line Interval Directly Impact Engraving Quality
The Pixelation Problem
I remember my first serious attempt at laser engraving on wood for a custom sign. I cranked the line interval to 0.25 mm to speed things up. The result? The text looked like it was printed through a screen door—visible lines, uneven shading, and a grainy mess.
Here’s what happened:
| Line Interval | Visual Result | Best For |
|---|---|---|
| 0.05–0.08 mm | Smooth, photo-like detail | Portraits, fine text, intricate designs |
| 0.1–0.15 mm | Good detail, slight texture | General signage, logos, decorative pieces |
| 0.2–0.25 mm | Visible lines, grainy look | Rough sketches, quick test runs only |
When the interval is too large, the laser skips areas between lines. Your wood laser cutter can’t fill in those gaps, leaving white space that breaks the illusion of continuous shading.
Material-Specific Quality Differences
The “right” interval changes based on what you’re engraving:
- Wood: Natural grain interferes with fine detail. intervals of 0.1–0.12 mm usually give the best laser engraving on wood results without overwhelming the wood’s texture.
- Metal: Smoother surface accepts finer intervals. 0.05–0.08 mm works well for laser engraving on metal, especially for portable tags or detailed artwork.
- Acrylic: Translucent and smooth. Tight intervals (0.06–0.1 mm) create crisp edges for laser engraving on acrylic, but go too fine and you risk melting the edges.
How Line Interval Controls Production Speed
This is where makers get frustrated. I’ve watched projects take 4 hours when they should take 40 minutes—all because of line interval.
The Speed Formula (Simplified)
Production Time ≈ (Engraving Area ÷ Line Interval) × Laser Speed Factor
When you halve the interval, you roughly double the number of lines the laser must draw. That means:
- 0.05 mm interval: ~20 lines per mm → slow but detailed
- 0.10 mm interval: ~10 lines per mm → 2× faster, still detailed
- 0.20 mm interval: ~5 lines per mm → 4× faster, noticeable grain
On my woodworking laser cutter, switching from 0.08 mm to 0.15 mm cut a 2-hour project down to 45 minutes. The quality drop was minimal for a rustic sign, but unacceptable for a photo portrait.
When Speed Matters More Than Perfect Detail
Not every project needs museum-quality engraving. Here’s when I use larger intervals:
- Test runs: 0.2–0.25 mm to check positioning quickly
- Rustic/deco styles: 0.15–0.2 mm for intentional texture
- Bulk production: 0.12–0.15 mm when you need 20 units in a day
- Large signs: 0.15 mm where fine detail isn’t visible from 3 feet away
Finding Your Sweet Spot: Quality vs. Speed
The best metal laser cutter operators don’t use one fixed interval. They adapt based on the project’s goal.
Here’s my personal workflow:
- Do a 30-second test: Engrave a 2×2 cm square at 0.08 mm, 0.12 mm, and 0.18 mm. Compare in under 2 minutes.
- Adjust based on material:
- Rough wood → bump to 0.13–0.15 mm
- Smooth metal → drop to 0.06–0.08 mm
- Clear acrylic → 0.08–0.10 mm - Re-test for speed: If the 0.12 mm version looks good, you just saved 40% time.
I once made 30 custom bottle openers for a wedding. The default 0.08 mm interval would’ve taken 9 hours. At 0.14 mm, it took 3.5 hours, and the guests couldn’t tell the difference from 2 feet away.
Common Line Interval Mistakes (and How to Fix Them)
Mistake 1: Using the Same Interval for All Materials
I burned my first batch of acrylic coasters because I used the wood setting (0.12 mm). The acrylic melted at the edges. Switching to 0.08 mm fixed it.
Fix: Always adjust interval by material, not by design.
Mistake 2: Going Too Fine for the Design
Engraving a rustic farm sign at 0.05 mm? You’re wasting time. The design doesn’t have fine details to show.
Fix: Match interval to design complexity. Bold text = larger interval. Photo = smaller interval.
Mistake 3: Ignoring Laser Power
High power + tiny interval = overheating. Low power + large interval = weak engraving.
Fix: Tune power and interval together. For laser engraving on wood, try 15–20% power with 0.1–0.12 mm interval.
Practical Example: Here's A Scenario Where This Can Help
Suppose a local bakery orders 15 wooden signs with their logo from you. You use 0.08 mm interval because you want “perfect” quality. The first sign takes 1 hour.Then you realize you you’d need 15 hours total—impossible for the deadline.
So you switch to 0.14 mm. The sign takes 28 minutes. The bakery owner can’t spot the difference. You deliver all 15 in one day successfully.
That’s the power of line interval. It’s not about being “right”—it’s about being efficient.
Quick Reference: Line Interval Chart by Material
| Material | Recommended Interval | Power Range | Best For |
|---|---|---|---|
| Wood (birch, maple) | 0.10–0.12 mm | 15–20% | Signs, coasters, decor |
| Wood (oak, walnut) | 0.12–0.15 mm | 18–22% | Rustic signs, boxes |
| Metal (aluminum) | 0.06–0.08 mm | 25–30% | Tags, tools, portable |
| Metal (steel) | 0.08–0.10 mm | 30–35% | Industrial labels |
| Acrylic (clear) | 0.08–0.10 mm | 12–18% | Signs, ornaments |
| Acrylic (colored) | 0.10–0.12 mm | 15–20% | Decor, lighting |
Start Making Better Projects Today
If you’re ready to stop guessing and start engraving with confidence, grab downloadable laser cutter projects from Radium Files. Every file comes with optimized line intervals for wood, metal, and acrylic.
👉 Explore the collection: https://radiumfiles.com
Your wood laser cutter will thank you. Your customers will notice the quality. And you’ll finish projects faster than you ever thought possible.
I’m Dhanraj, and I’ve been in your shoes—struggling with pixelated engravings, wasted material, and deadlines I almost missed. Now I build files that make your life easier. Let’s make something great together.